
A Beginner’s Guide to How to Record Screen and Audio on Windows 10

A Complete Guide to How to record screen and audio on windows 10
Recording screens and audio on PCs can be such a daunting task if you are a beginner. But what if we tell you that, as a beginner, you can gain expertise at recording screen and audio? Yes, you read it right. In this article, we will let you know about the amazing tools so that the question “How to record screen and audio on windows 10” will no longer be left with you.
So, without further ado, let’s delve into the topic to gain insights.
Navigation
Part 1: Importance of Screen and Audio Recording on Windows 10
Part 2: Why Choosing the Right Tool for Screen and Audio Recording is Important?
Part 3: Windows 10’s Built-in Tool for Screen and Audio Recording
Part 4: Enhance Your Recordings with Wondershare DemoCreator: An Ultimate Choice for Recording Screen and Audio on Windows 10
Conclusion
FAQs
Part 1: Importance of Screen and Audio Recording on Windows 10
Before heading to the topic “How to record screen with audio on windows 10,” let’s discuss why screen and audio recording on windows 10 can be important to you.
Screen recording helps you with lectures, presentations, or training sessions to create reference material for future use. With this, you can easily create step-by-step tutorials and product demos to share with others, which makes it easier for them to learn and understand difficult concepts. Moreover, it becomes quite easy to facilitate collaboration and reviews while recording meetings, brainstorming sessions, or video conferencing.
However, with audio recording, you can create high-quality audio for podcasting, which allows you to share your expertise with a wider audience. It can also be beneficial for music production, voiceovers, and audiobooks.
With the help of recording screens and audio, you can save time and resources as compared to the traditional method of creating videos and writing reports. Moreover, recording errors and issues can be beneficial for you if you want to identify and fix problems easily.
Hence, we can observe that using a screen and audio recorder is such an important tool to make your work easy in the digital world.
Part 2: Why Choosing the Right Tool for Screen and Audio Recording is Important?
We have discussed why a Screen and audio recorder is important. But choosing the right tool is way more important, as it may enhance the following factors to create engaging content.
- The right tools help to provide high-quality recordings that are crisp, clear, and free from noise.
- Recorders for screen capture with audio need to be user-friendly because they will help you focus on your task rather than struggling with technical issues.
- Don’t forget to ensure the compatibility of the software with the computer, operating system, and other devices for seamless integration and fewer technical issues.
- Search for recorders that help with customization to tailor settings to suit your specific needs and get unique content.
- Choosing the right software will be beneficial for you in the long term, as you won’t need any additional software or hardware to purchase.
- It offers flexibility in terms of settings, recording formats, and editing options.
- Right software helps you save time by automating tasks like file naming, organization, and tagging, providing more time for creative work.
Part 3: Windows 10’s Built-in Tool for Screen and Audio Recording
If you are seeking a screen and audio recorder for which you don’t want to pay any amount, then a built-in toot is a great fit for you. Xbox Game Bar is a built-in tool for Windows 10 provided by Microsoft. It is specially made for gamers, but it can be used for many purposes because of its amazing features. For instance, if you are recording your game, then you can adjust the volume of the media player and other apps without switching to the desktop.
Moreover, you can observe your computer’s performance and use Spotify to listen to music and chat while playing games without any disturbance in the game.
If you want to learn about recording, then this simple step-by-step guide will help you.
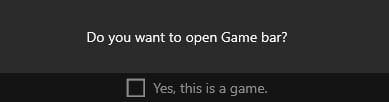
Step 1: First, open the Xbox Game Bar while pressing the Windows logo key + G and check the box Yes, this is a game.
Step 2: If you are playing a game in full screen, then press the Windows logo key + Alt + R for immediate recording.
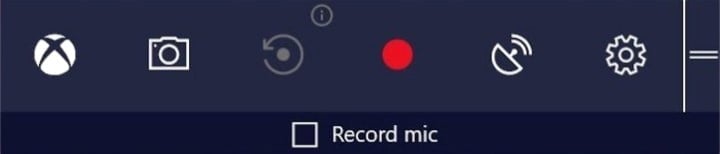
For still screenshots, you can click on the Camera, whereas to start recording, click on the Red Circle button. If you want to record your voice, then check the box Record mic. You can save your video by default in an MP4 file (.mp4) under Video > Capture.
Part 4: Enhance Your Recordings with Wondershare DemoCreator: An Ultimate Choice for Recording Screen and Audio on Windows 10
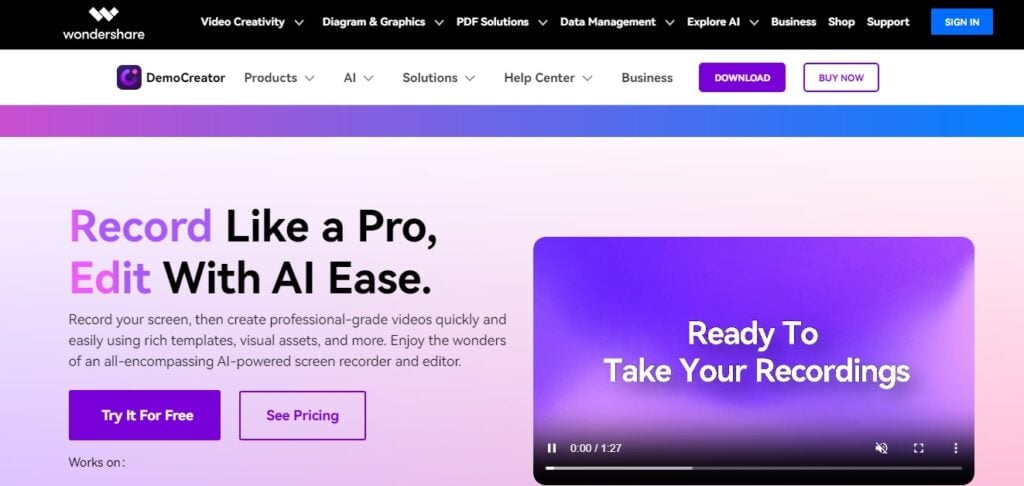
Though built-in tools can be used to record screens and audio, there is still a need for third-party tools for professional work. These tools provide advanced features so that you can create mesmerizing content for your target audience in a matter of minutes. Well, to make your work a little easier, we are sharing a tool that can work as a complete suite of recording screen and audio as well as editing. This tool is Wondershare DemoCreator, a leading screen and audio recording software that helps you create unique content.
It is a user-friendly software that offers a wide range of features to create professional-looking videos. With Wondershare DemoCreator, you can easily record screen and audio on your device.
Moreover, it is compatible with Windows (including Windows 10 and Windows 11) and Mac, so you don’t need to worry about the device you are working on.
Key Features:
- Offers clear and smooth screen recording that captures every detail in 4K/8K quality with a long recording time.
- Provides easy recording of audio from microphone and system while capturing screen.
- It is quite easy to share recordings of audio and video on platforms such as TikTok, YouTube, Vimeo, and more.
- You can record screen and webcam together.
- It offers multi-track recordings so that you can control each track separately, including audio track, video track, and camera track.
- It provides free storage of up to 512 MB. If you want to increase storage, you can opt for a subscription.
- Comes with advanced features for audio and video editing to make your work easy.
Pricing:
- It is available in a free version.
- Individuals Cross-Platform monthly plan comes with US$15/month.
- Individuals Cross-Platform yearly plan costs US$59.99/year.
- Individuals Perpetual Plan costs US$79.99.
- Its Team plan for business costs US$69.99/year and its perpetual plan costs US$99.99.
- Annual plan for students costs US$29.99.
As you are familiar with its features and pricing, we are mentioning a step-by-step guide for using it.
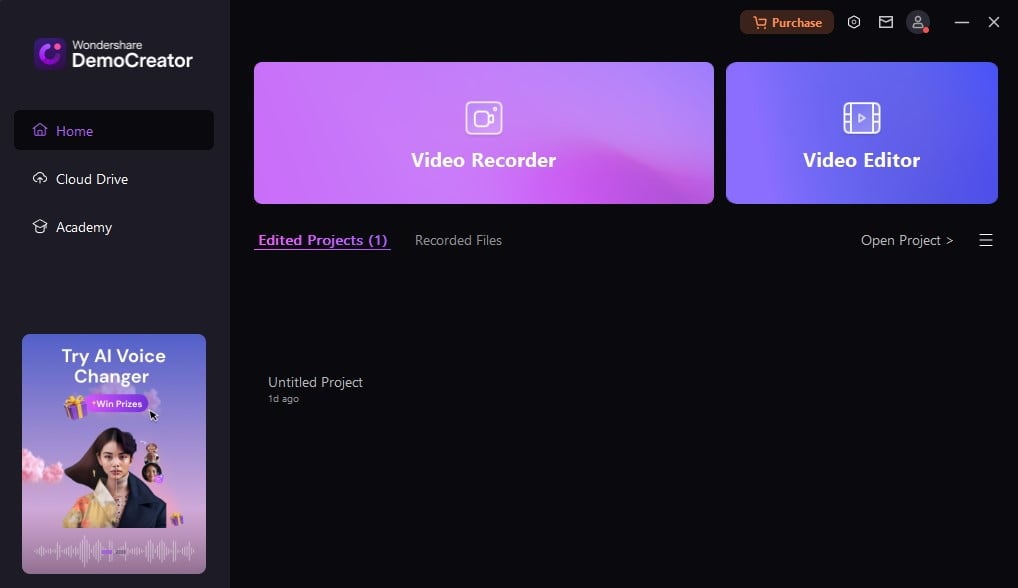
Step 1: First,download Wondershare DemoCreator from the official website. Then, you need to launch it on your device and open it. Once you open it, it will navigate you to the “Home” page, where two options will appear, “Video Recorder” and “Video Editor.” Click on “Video Recorder” for recording.
Step 2: Here, you will get six different modes of recording. To record the screen, click on the “Screen” option.
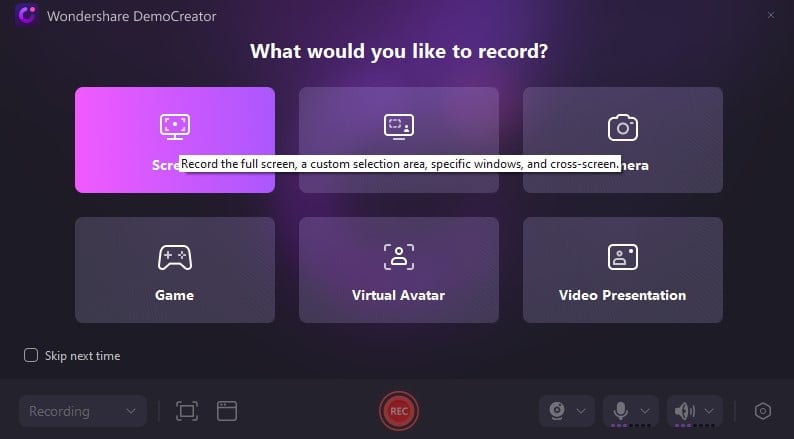
Step 3: After clicking on the “Screen” option, you will get the option of selecting an area, an audio option, and a webcam option for recording. You need to make sure that all the audio devices are detected. Then, click on the “REC” button to record.
Step 4: Once you have finished recording, click on the red button to stop the recording.
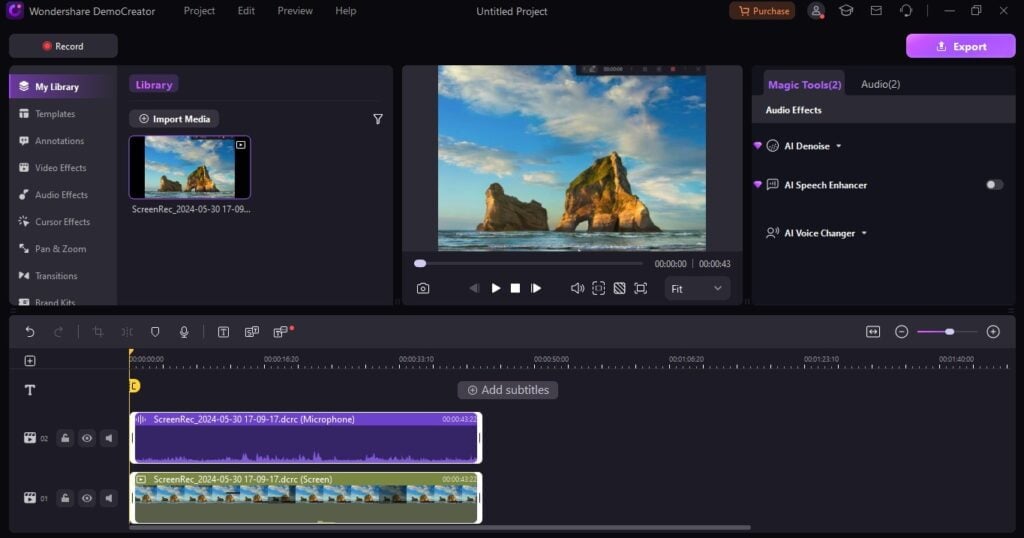
Step 5: Here, you can easily edit your recording and export it while clicking on the “Export” option that appears at the top right corner of the page.
Hope, this step-by-step guide is beneficial for you. If you want to explore more amazing features, then you must try the paid version to get flawless content.
Conclusion
Here it is, all! With the help of this topic, we tried to tell you about two tools that are suitable for you to record screen and audio on Windows 10. One of them is built-in and the other is a third-party application. A built-in tool is best for you if you don’t want to spend a single penny. But to get more advanced features, you must try Wondershare DemoCreator as a screen and audio recorder as it helps you create engaging content for your video.
FAQs
- Is it possible to record my screen and audio at the same time?
Yes, you can record your screen and audio at the same time using Wondershare DemoCreator.
- What is the best way to record my screen and audio on Windows 10?
You can use the built-in Game Bar and Wondreshare DemoCreator as a third-party application to record screen and audio on Windows 10.
- Are there any free alternatives to record my screen and audio on Windows 10?
Yes, you can record screen and audio on Windows 10 for free with Wondershare DemoCreator, OBS Studio, and Camtasia.

Latest magazine
June 27, 2024

Magazine
- AVALAN ROKSTON Cover Interview
- Raver Passport: Summer Destinations
- Baleric Beat: A Brief History of Ibiza's Iconic Sound